
Add your first dataset
A dataset is a set of recordings you label together, with their events and everyone’s answers. Adding one takes four short steps. Sift reads your recordings where they are. Nothing is copied: the dataset only records where the audio is.
flowchart LR
  audio["Audio: where is it?"] --> scan["Scan: what was found"]
  scan --> labels["Labels (optional)"]
  labels --> details["Details: name and title"]
  details --> done["Dataset created"]
  note["Audio stays where it is. Only its location is recorded."] -.- audio
Open your project, go to Datasets in the sidebar, and click Add dataset. On a new project’s home you can also click Add dataset in the first step.
In an organisation project, only the project’s managers can add datasets. If the button is greyed out, ask a manager.
1. Where is the audio?
Section titled “1. Where is the audio?”Choose where the recordings are:
- This computer: a local or external drive. Click Add folders… and pick one or more folders, or drop folders onto the window.
- Network or cluster: a mounted path. Type the path, for example
/mnt/cluster/project/audio, and click Add path, or click Browse…. - Google Drive folder: recordings stay on Google Drive and Sift fetches only what you open. If this card says “Not set up in this build”, your copy of Sift can’t use Google Drive. See Google Drive datasets.
- A published version: recordings and labels together, read-only, from another project or an export. Click Choose a version…. This continues in its own dialog on the Datasets page. See Published versions and exports.
Amazon S3 is not available yet.
Each folder you add is listed with a Subfolders checkbox. Leave it ticked to include recordings in folders inside it. Click × to remove a folder.
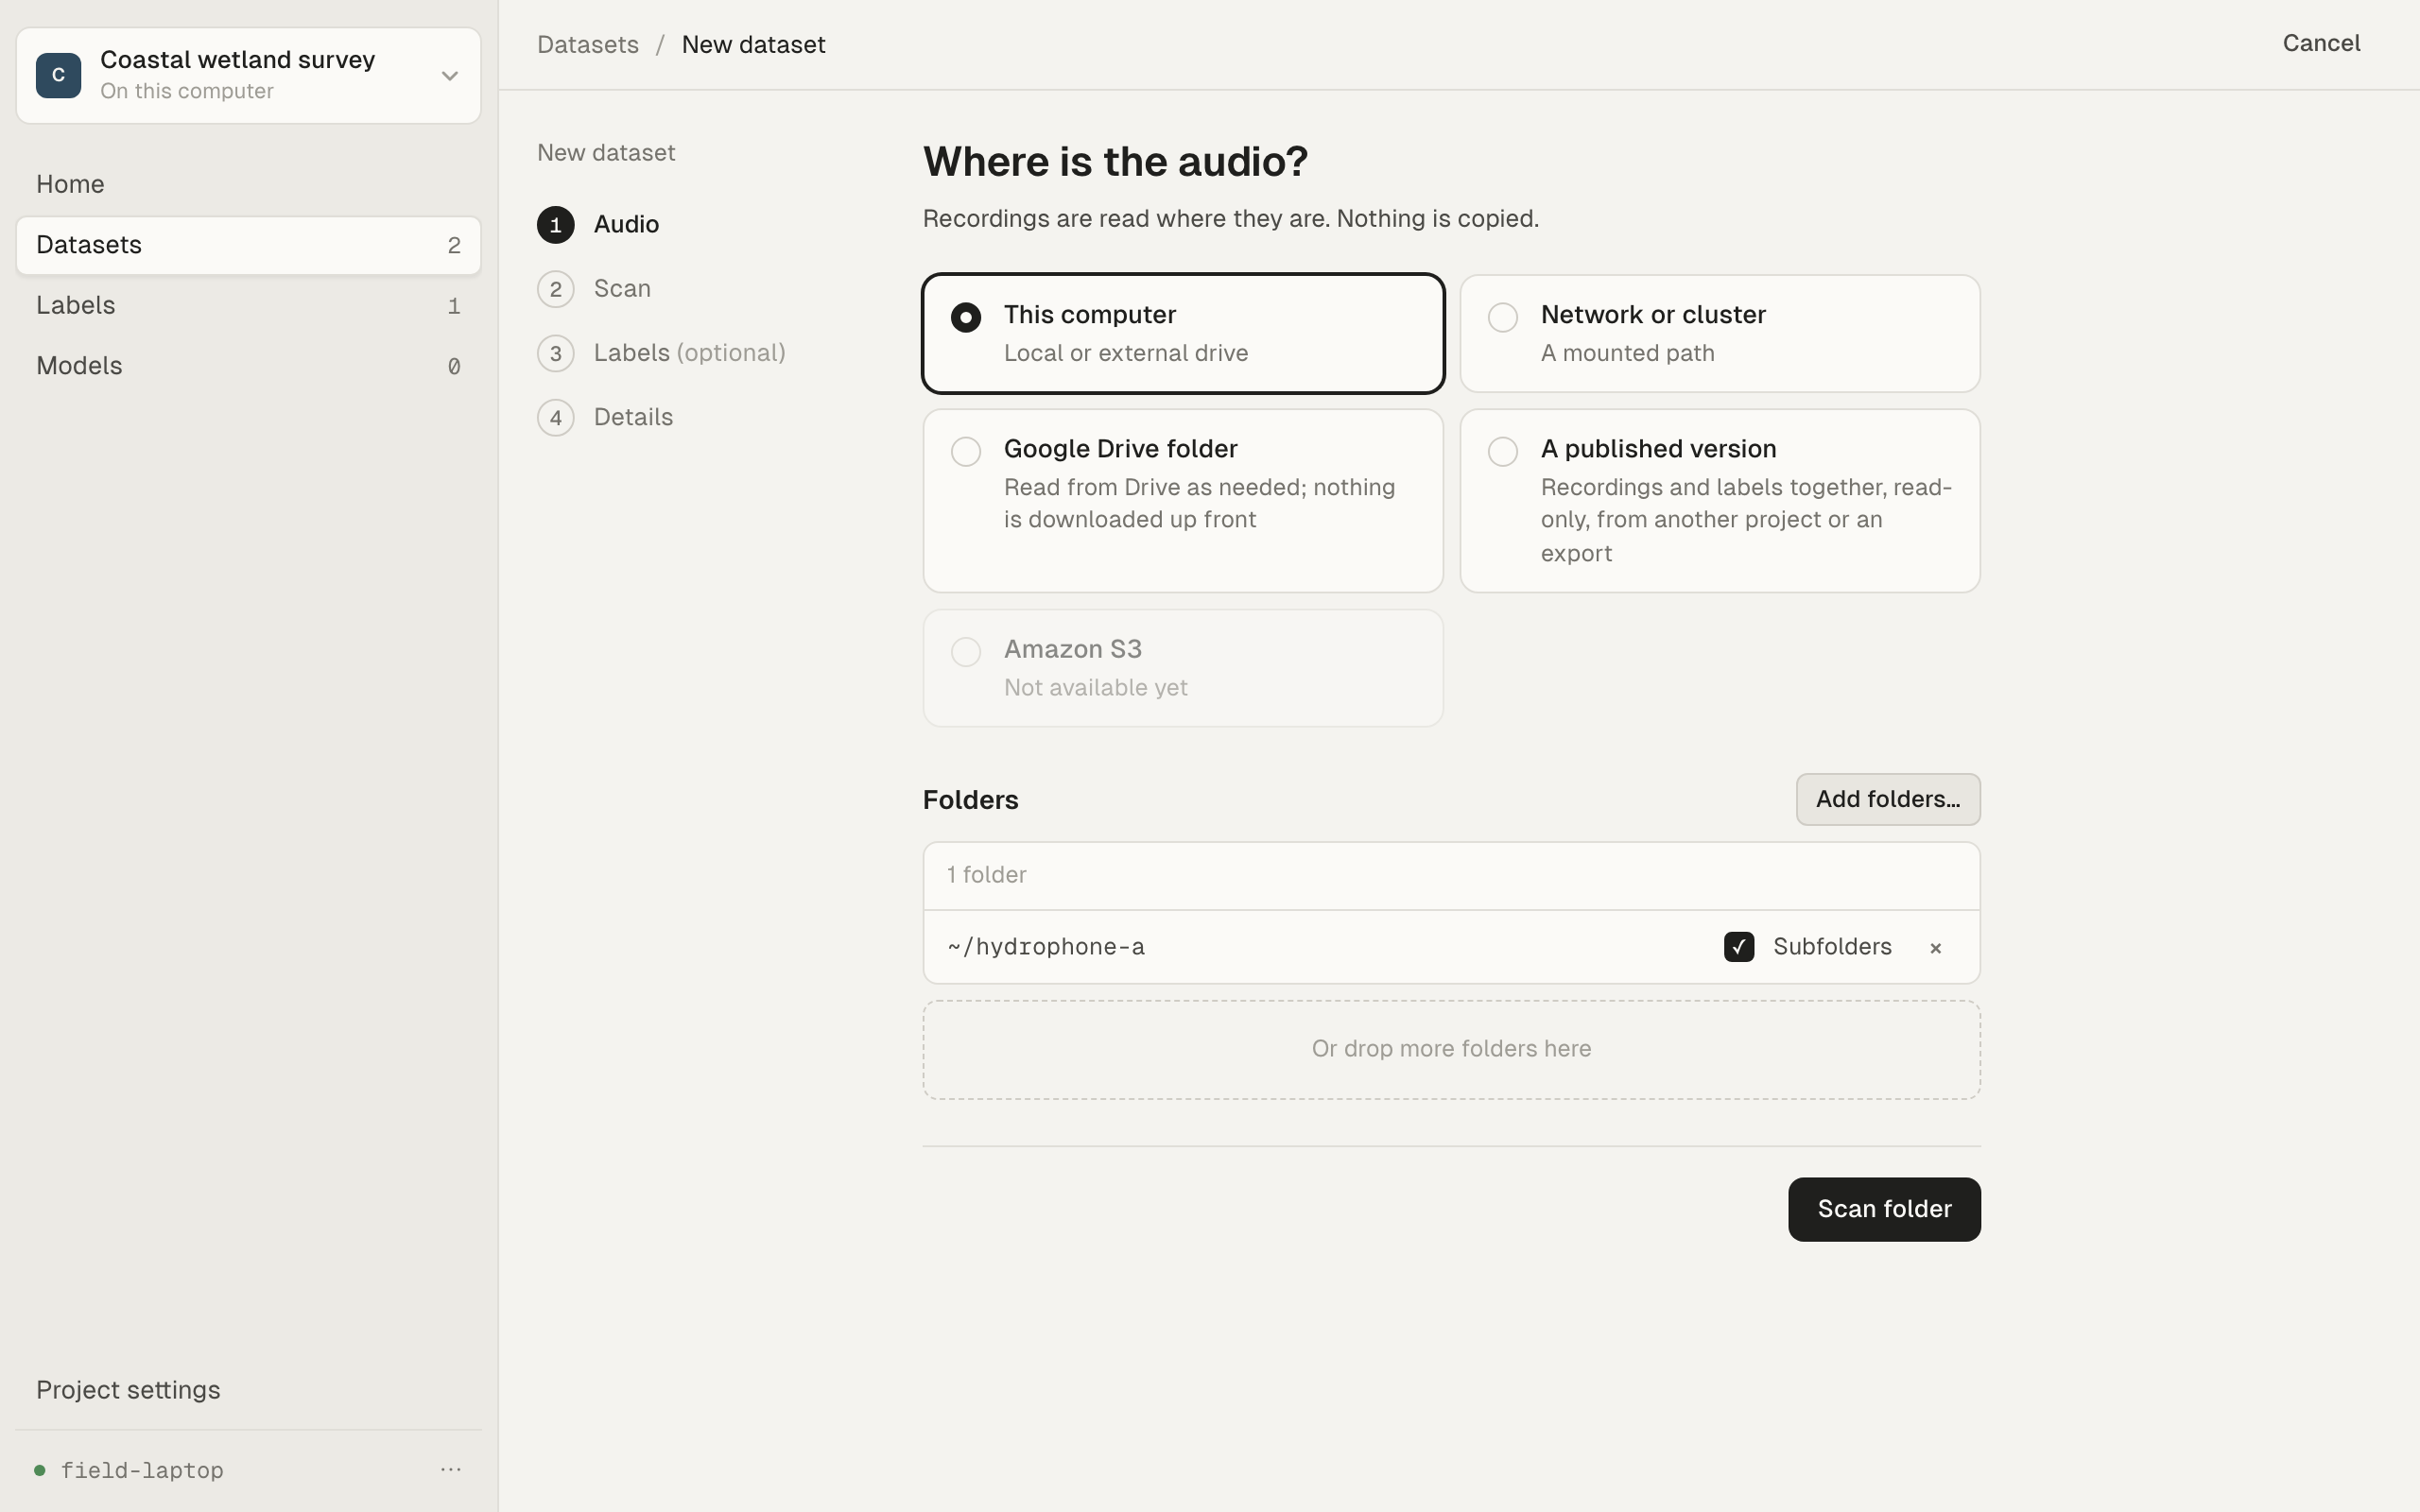
When your folders are listed, click Scan folder (or Scan N folders).
2. Scan results
Section titled “2. Scan results”Sift reads the folders and shows what it found. Nothing has been created yet.
The tiles show the number of recordings, how many hours of audio, the sample rate, and the size on disk. If the recordings have start times, Sift shows the dates they span, in UTC.
Under Checks, Sift flags anything worth knowing before you go on:
- Recordings with no start time. They’ll be added, but without a date.
- Different sample rates. Each rate is listed with how many recordings have it.
- Files that couldn’t be read. They’ll be skipped. Click Show to see which files and why.
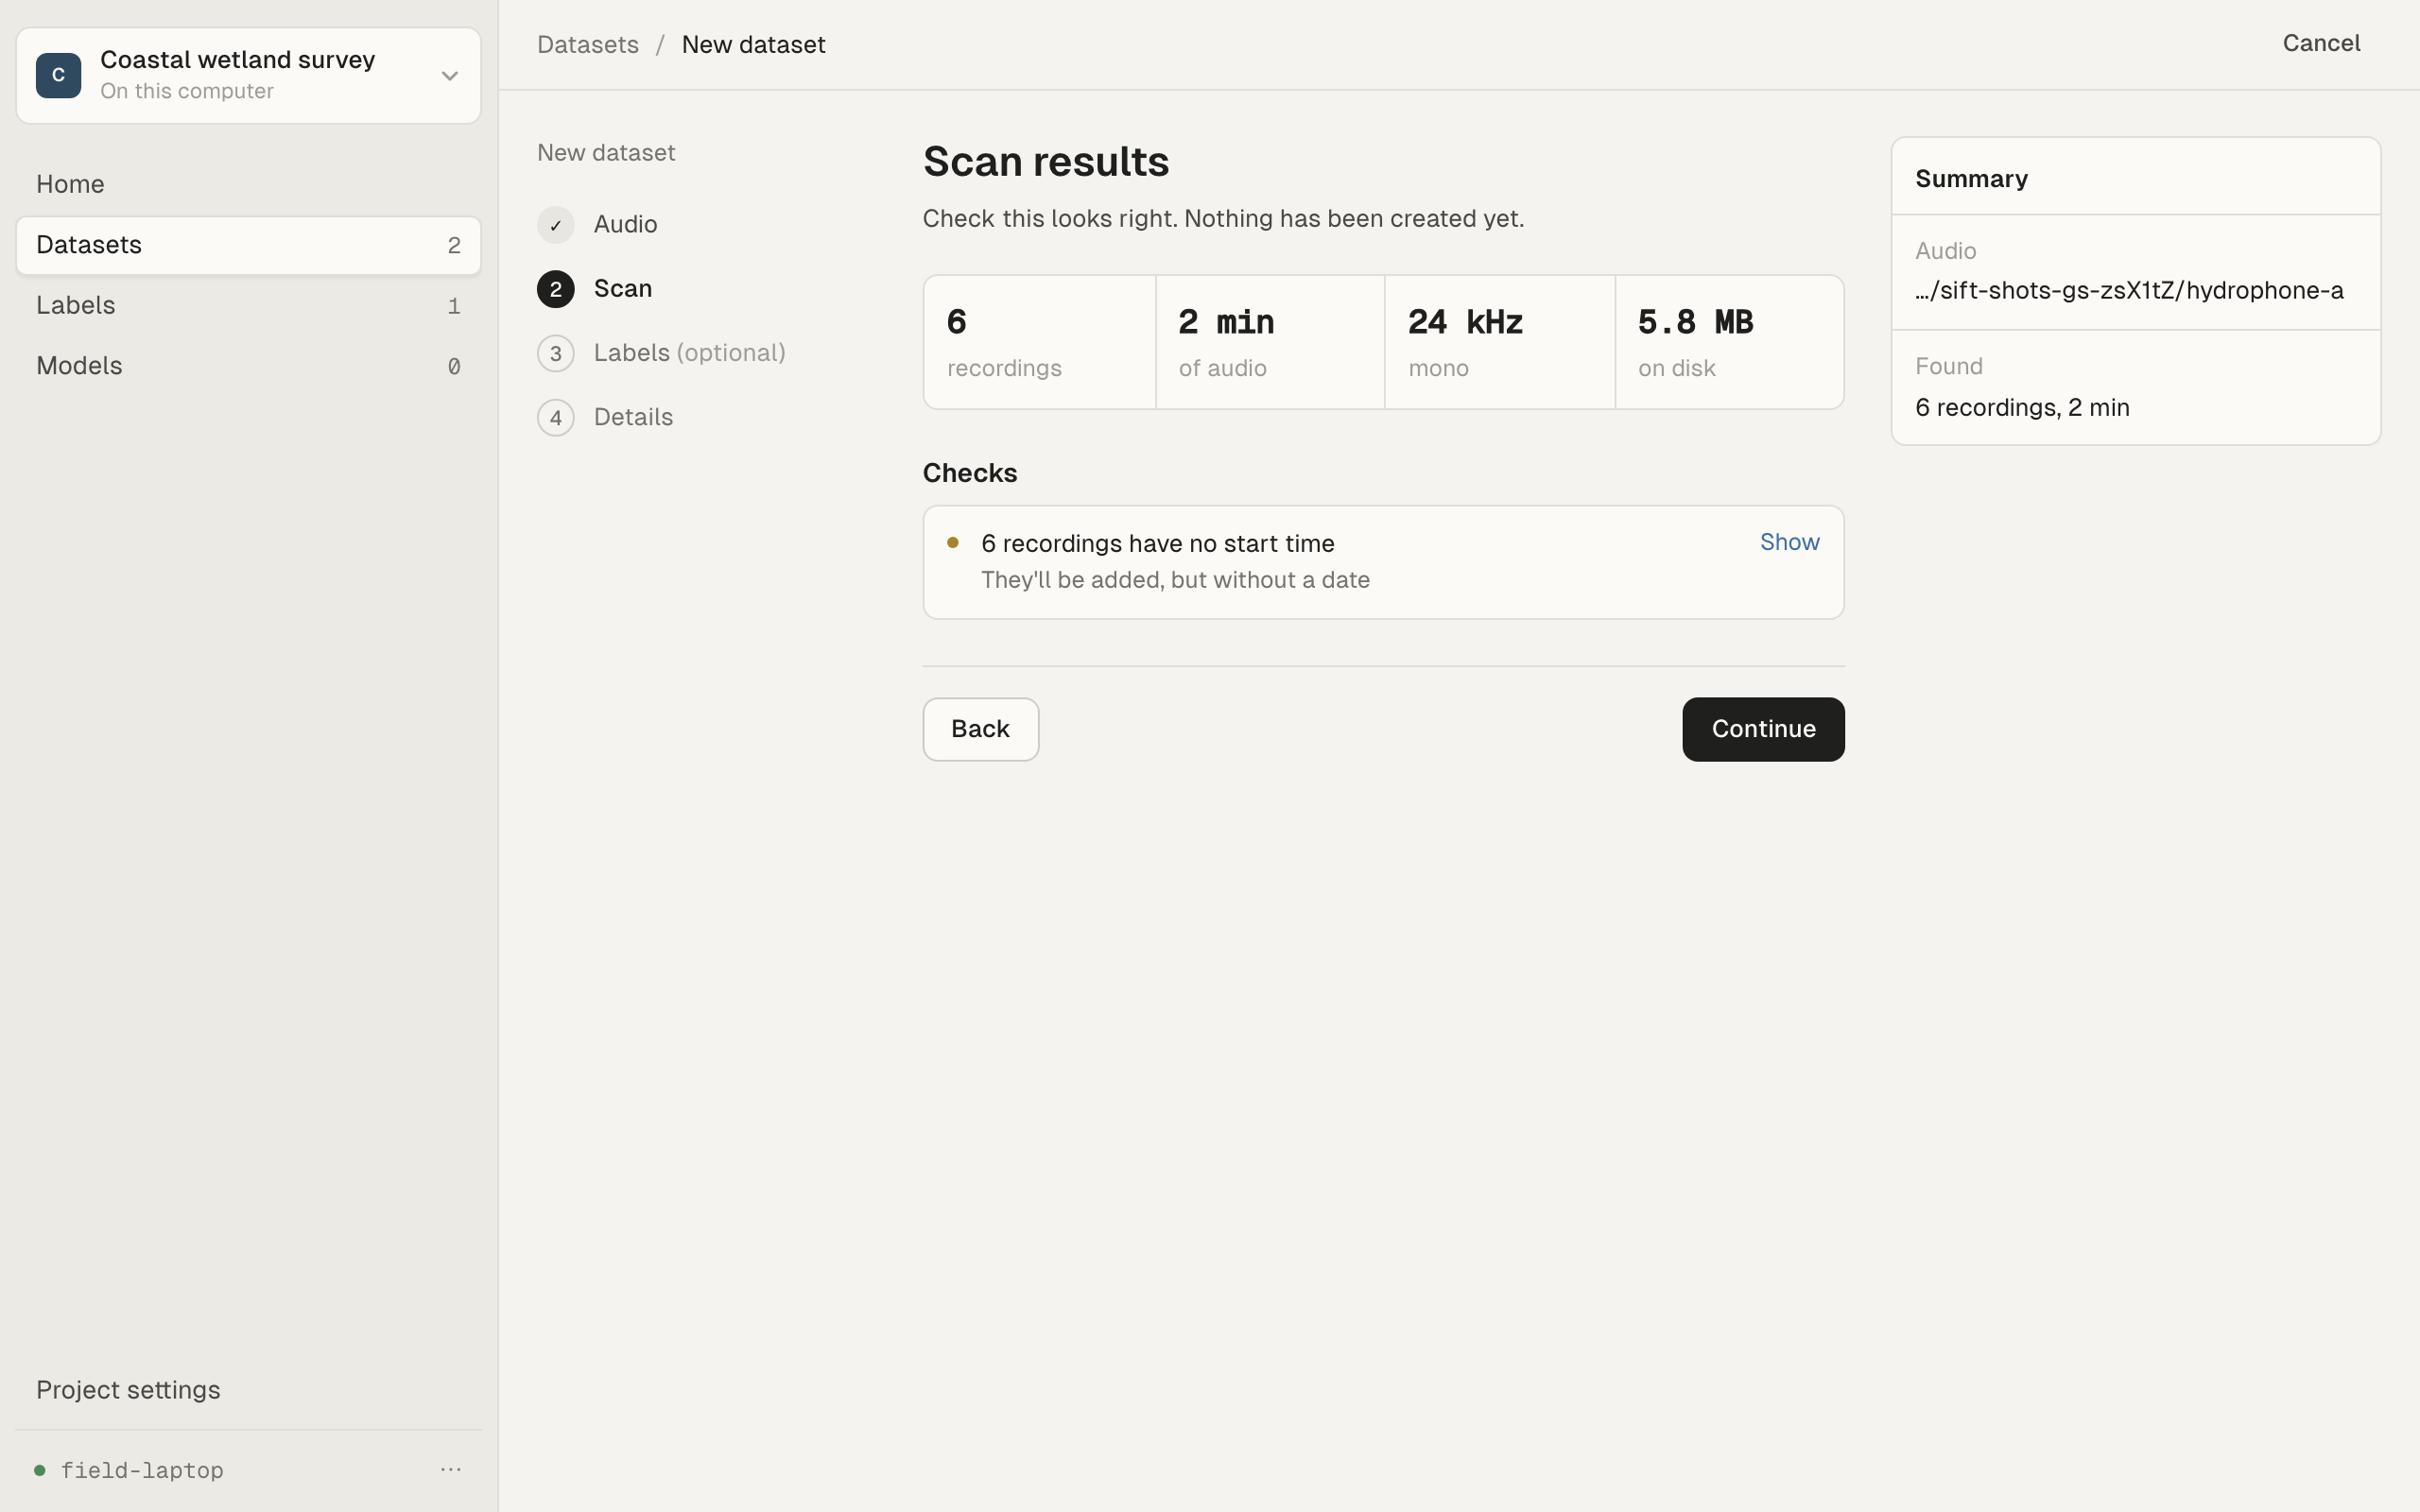
If this isn’t what you expected, click Back and change the folders. Otherwise click Continue.
3. Labels (optional)
Section titled “3. Labels (optional)”Pick the label set this dataset starts from. Its labels are what you choose between when you answer an event or label a box. The project’s default set is chosen for you if it has one.
The dataset gets its own copy of the labels. You can change them for this dataset later without affecting other datasets.
If the project has no label set yet, a manager can make one here:
- Click New label set….
- Give it a Name, for example “Harbour calls”.
- In New label, type a label’s name and press Enter. Type the next one and press Enter again. Each label gets a colour. In the labeller, keys 1 to 9 choose the first nine labels in the order they are listed. The sheet also shows a Hotkey for each label, but the labeller doesn’t use it. Only the order counts. You can also paste a list, one name per line or separated by commas.
- Click Create and use.
The new set is saved to the project’s label sets and chosen for this dataset. Its labels show below the choices.
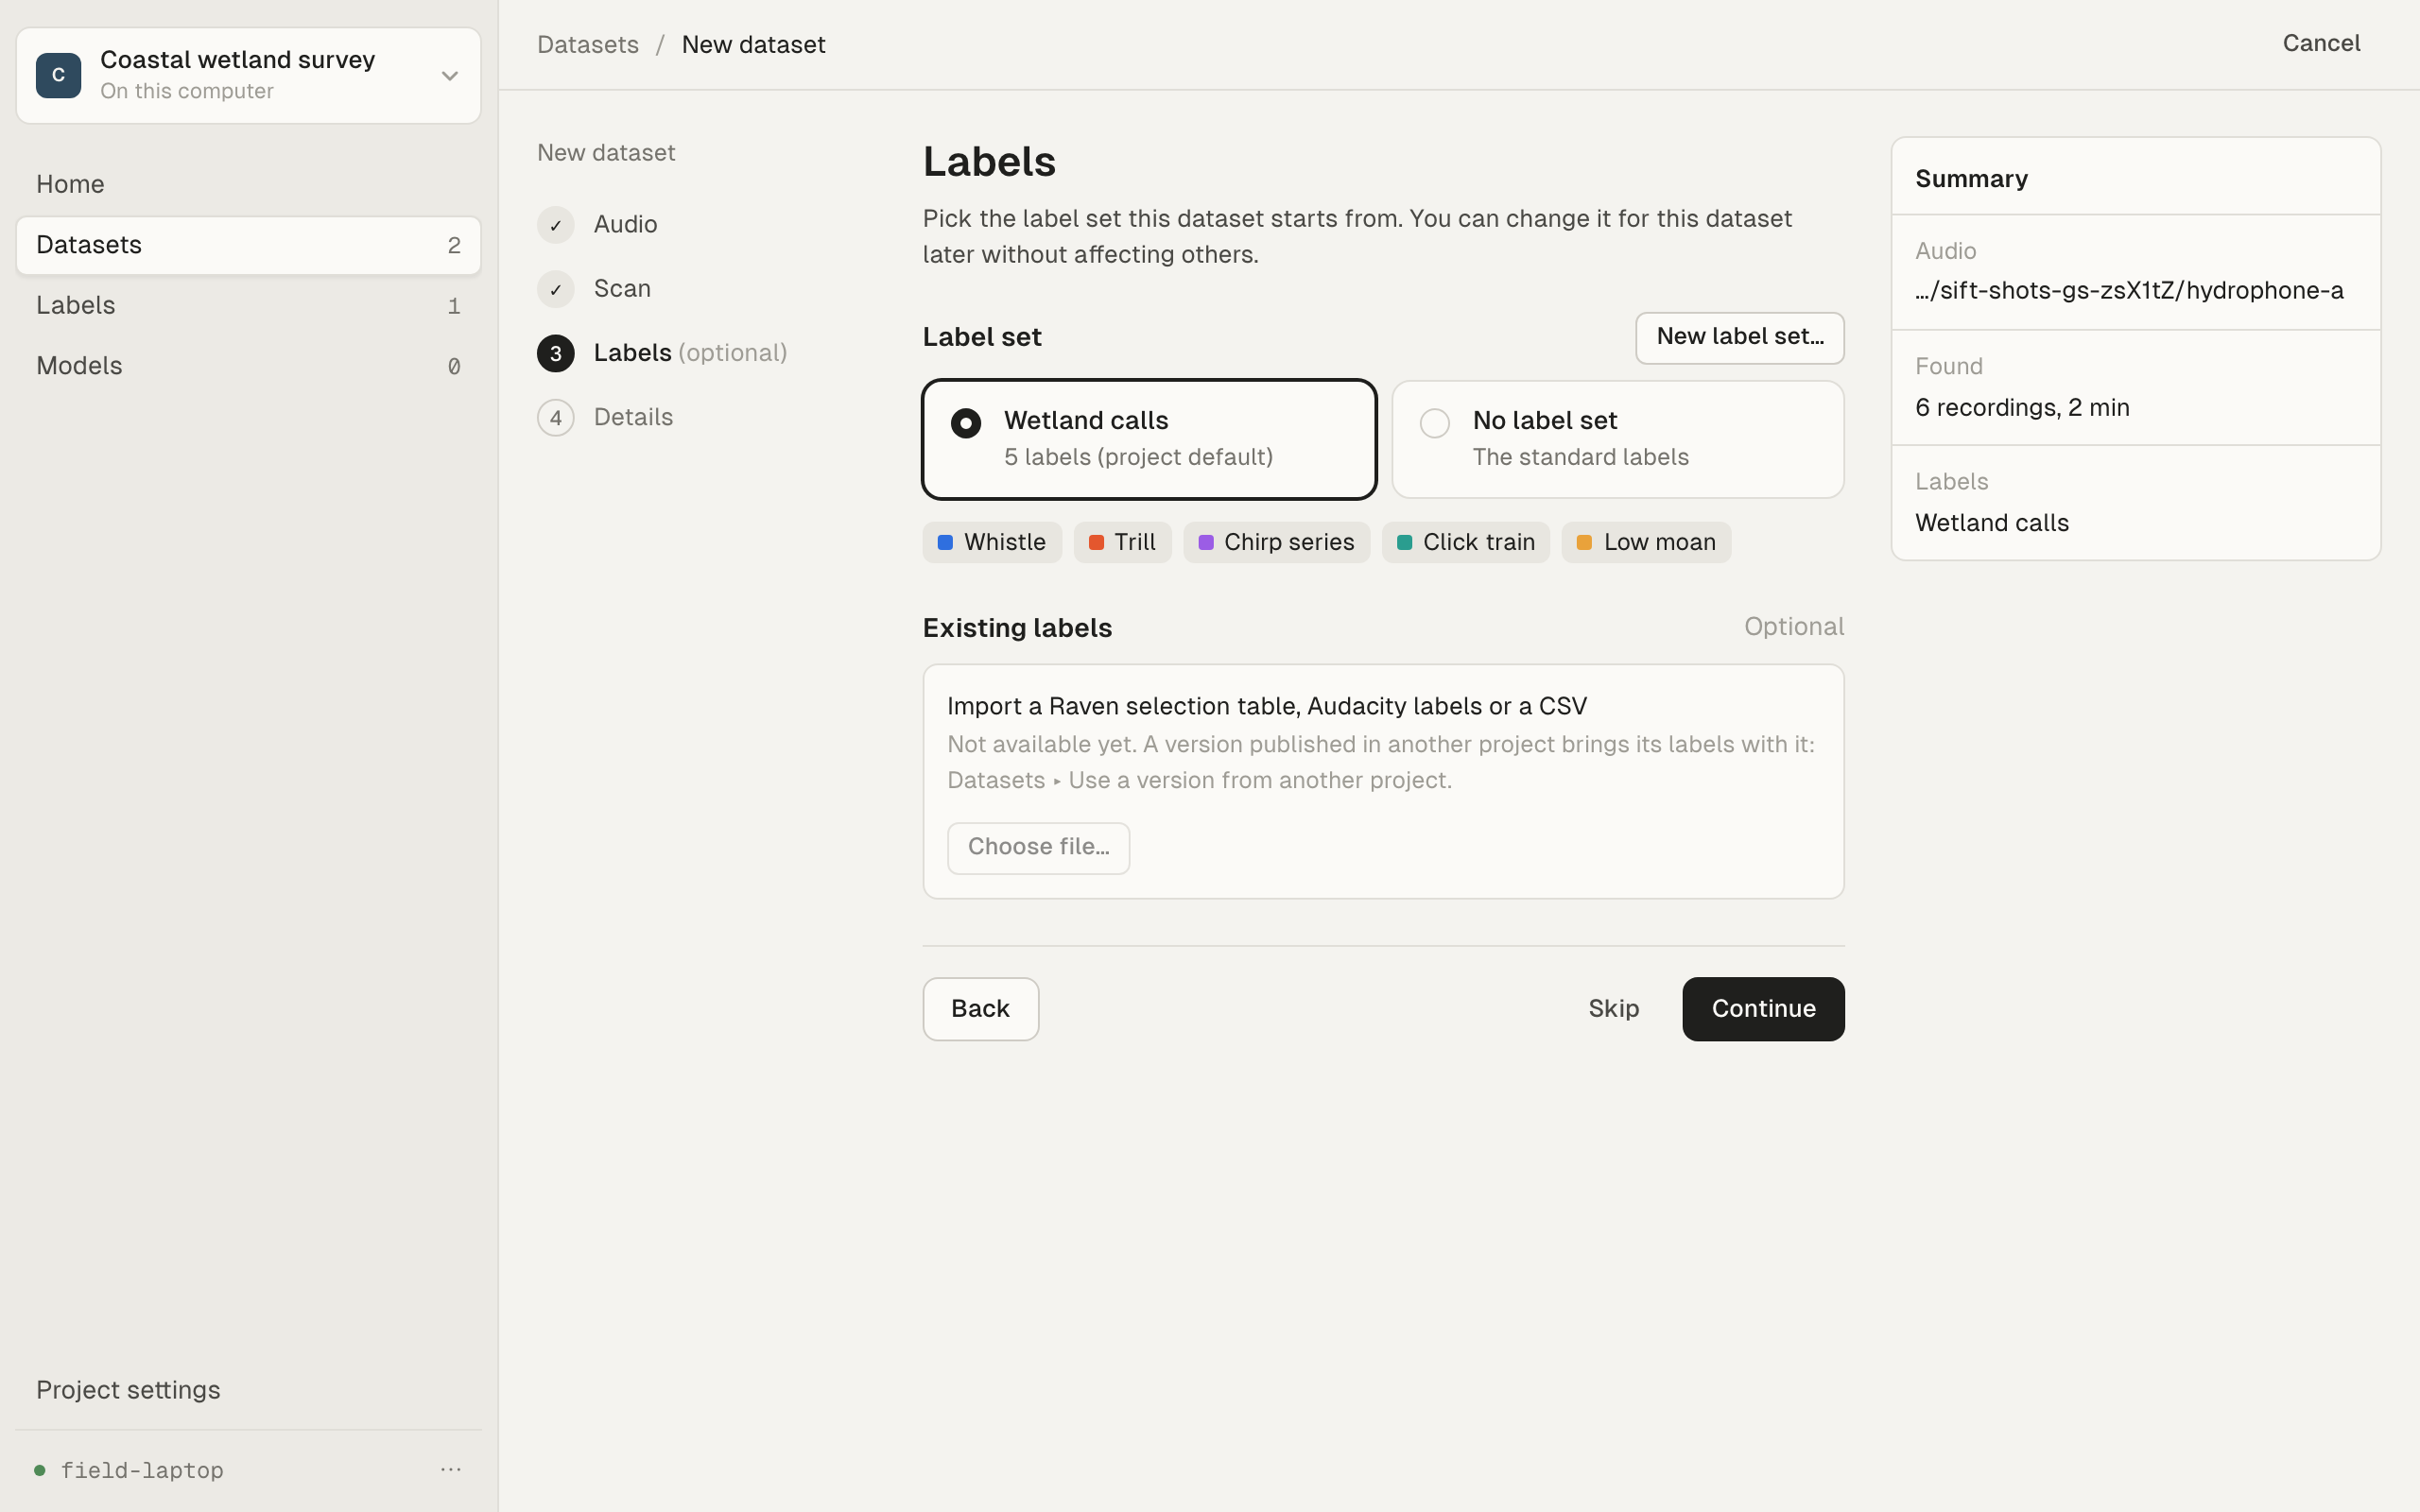
If you choose No label set, the dataset starts with the standard labels. Click Skip to go on without choosing, or Continue.
Importing existing labels from a Raven selection table, Audacity labels or a CSV is not available yet.
4. Details
Section titled “4. Details”Fill in how the dataset appears in the project:
- Name: a short technical identifier, made of lowercase letters, numbers and underscores, for example
harbour_survey. Sift suggests one from the folder name. It must be unique. - Title: the readable name people see, for example “Harbour survey”. It is optional, but worth setting: people know a dataset by its title, while the name is a technical identifier.
- Organisation: who collected the recordings.
- Site: the deployment or location. It defaults to the name.
- Notes: anything else worth knowing.
Click Create followed by the name. Sift adds the recordings and opens the dataset.
Creating a dataset doesn’t publish anything. Its first published version, v1, is made when you publish it. See Published versions and exports.
What you have now
Section titled “What you have now”The dataset lists its recordings, but it has no events yet. You get events in two ways:
- Apply a model to find candidate events automatically.
- Draw boxes yourself in the labeller’s Recording view.
Both are covered next in The labeller in 10 minutes.
Troubleshooting
Section titled “Troubleshooting”“No readable recordings”. No .wav files could be read in the chosen folders. Check you picked the folder that holds the recordings, and that Subfolders is ticked if they are in folders inside it.
“Couldn’t read the audio”. Sift couldn’t scan a folder, for example a drive that was unplugged or a share that isn’t mounted. Connect it and scan again.
“A dataset called … already exists”. Names must be unique in the project, and in an organisation across all its projects. Choose another name.
“Use lowercase letters, numbers and underscores, starting with a letter or number.” The name has a space, a capital letter or another character. Put the readable version in Title instead.