
Set up an organisation
An organisation is the group of people who share projects through a hub. You set it up once in the hub web app. Then you invite people, and they sign in from the desktop app.
This page assumes the hub is running. If it isn’t, start with Deploy and run the hub.
flowchart LR
  A["Fresh hub"] --> B["Setup wizard:<br/>first hub admin,<br/>organisation and owner"]
  B --> C["Invite your team<br/>(by email)"]
  C --> D["Each person opens<br/>the link and joins"]
  D --> E["They sign in from the<br/>desktop app with the<br/>hub address"]
Which way in
Section titled “Which way in”Open the hub’s address in a browser. What you see depends on the hub:
- A fresh hub (nobody has set it up) opens the setup wizard, Set up Sift Hub. The account you create is the first hub admin and the owner of the first organisation.
- A hub that is already set up opens the sign-in page. If the hub lets anyone set up an organisation, the sign-in page on the hub’s own address has New to the Hub? Set up an organisation under the form. It opens the wizard as Set up an organisation. You create your account and become the new organisation’s owner. The link doesn’t show on an organisation’s own address.
- A hub that doesn’t let anyone set up an organisation has no such link. Only a hub admin can create an organisation there, from the hub admin area or the server’s command line. Ask whoever runs the hub. If you go to
/setupby hand, it says “This Hub is already set up”. - Signed in already, choose + New organisation in the organisation switcher. The wizard skips the account step. This only works if the hub lets anyone set up an organisation, or if you are a hub admin. Otherwise the wizard says “This Hub doesn’t allow new organisations.”
Whether anyone may set up an organisation is a server setting, HUB_REGISTRATION_OPEN. Production hubs usually turn it off.
Run the setup wizard
Section titled “Run the setup wizard”1. Your account
Section titled “1. Your account”Enter your Full name, Work email and a Password. The checklist under the password shows the rules it has to meet.
Some hubs also ask for a Setup token, so that only the person who runs the server can claim a fresh hub. It is the value of HUB_SETUP_TOKEN in the server’s configuration.
Choose Create admin account (or Continue).
2. Create your organisation
Section titled “2. Create your organisation”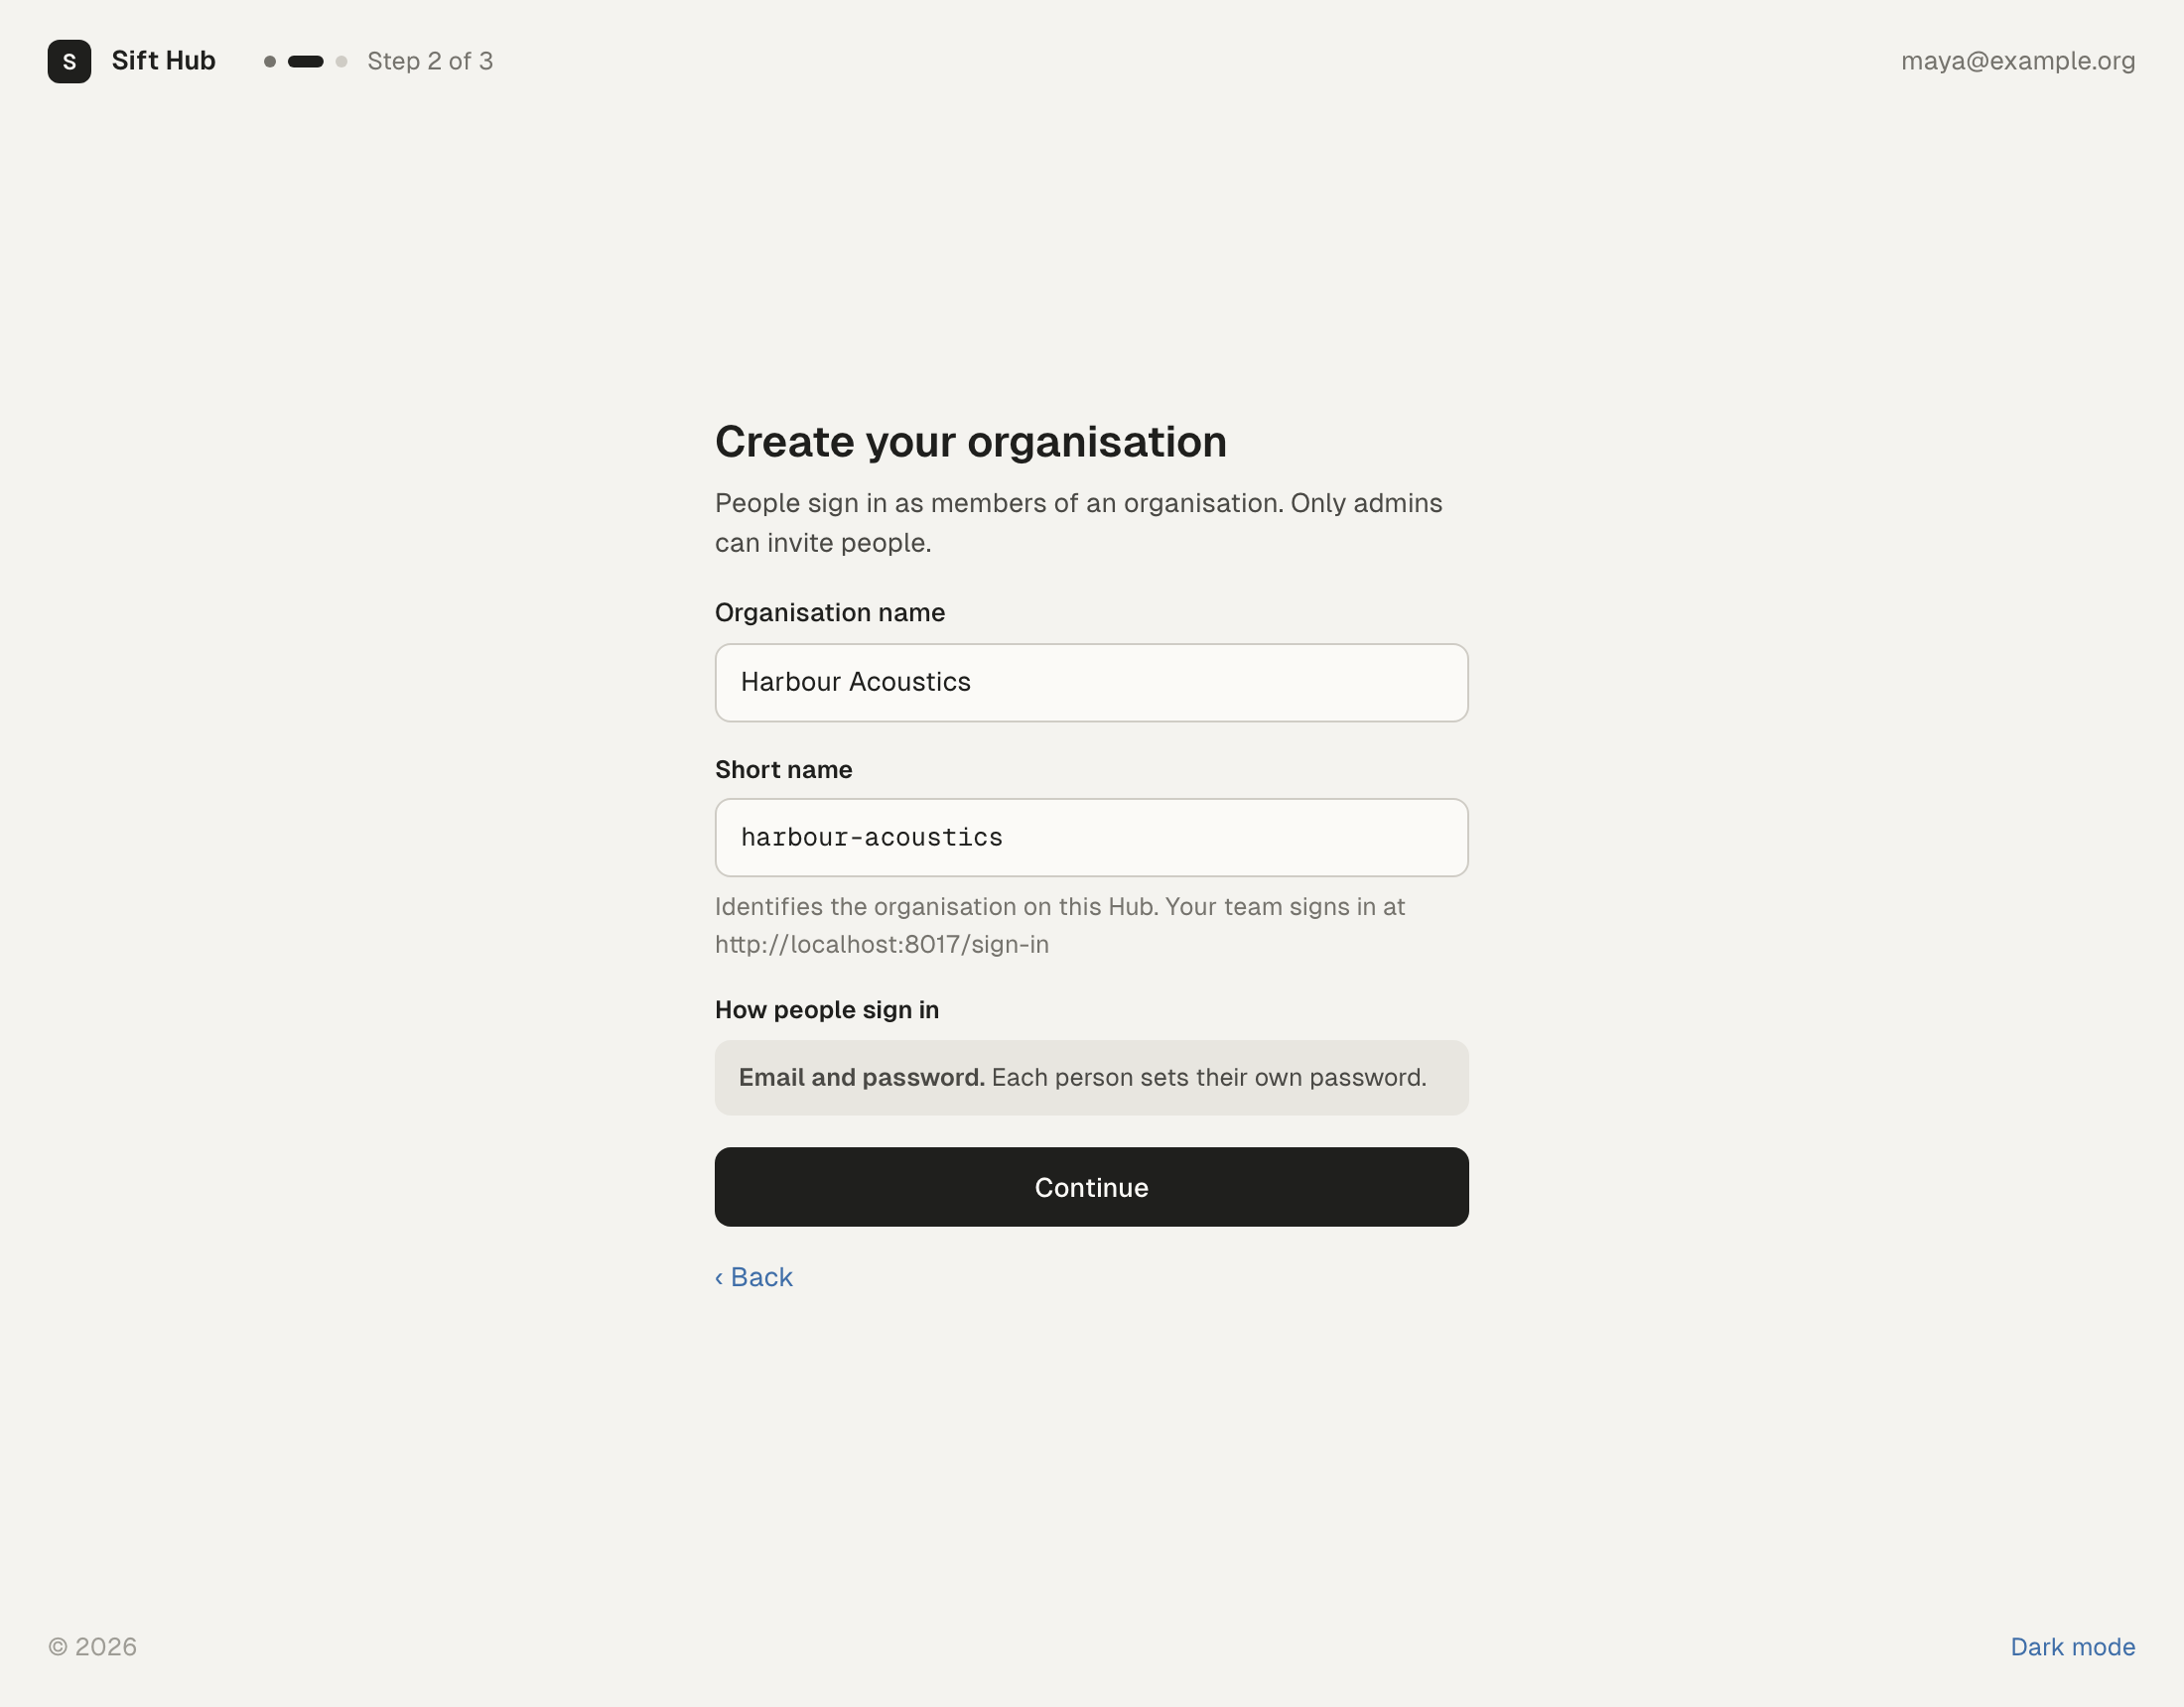
- Organisation name: the name people see, for example “Fathom”.
- Short name: filled in from the name. It identifies the organisation on the hub and is part of its address: 3 to 48 lowercase letters, digits or dashes, with no dash at either end. Some names are reserved.
People sign in with an email and password, and each person sets their own password. Choose Continue.
If the short name is taken, choose another. You can change it later in Organisation settings, but that changes the organisation’s address.
3. Invite your team
Section titled “3. Invite your team”Type one email address per row and pick a role for each:
- Admin: manages people, every project and the organisation’s settings.
- User: adds datasets, labels, applies models and publishes.
Use + Add another for more rows, or Paste a list to add many at once. A Personal note is included in the invitation email. Then choose Send invitations, or Skip for now and invite people later from the People page.
If you created your account through open registration, the hub asks you to Confirm your email first. Open the link it sent you, then send the invitations.
4. Ready
Section titled “4. Ready”The last step shows a Sign-in address, with a Copy button. It is built from the address the wizard is open at, which is usually the hub’s own address. If your hub gives each organisation its own address, share the organisation’s address instead. Organisation settings shows it under Short name.
When the hub web app was built with a downloads address, this step also shows the hub address to enter in the desktop app, and a link to download the app. Like the sign-in address, it comes from the address the wizard is open at.
Choose Go to the Hub to open the organisation’s Overview.
Invite people later
Section titled “Invite people later”On the People page, choose Invite people. See People. If the organisation lists Allowed email domains, only addresses at those domains can be invited.
The hub sends invitations by email. If the hub has no mail server set up, no email is sent. Whoever runs the server gets the link with hub invite and sends it to you. See Deploy and run the hub.
Accept an invitation
Section titled “Accept an invitation”Invitations expire after 7 days, and each link works once.
In the browser
Section titled “In the browser”The link in the email opens the hub web app. It shows who invited you, to which organisation, and the role you will have.
- Your Work email comes from the invitation and can’t be changed.
- Enter your Full name. It is shown next to your labels and activity.
- Choose a Password.
- Choose Join followed by the organisation’s name.
If you already have an account on that hub, choose Sign in at the top instead. The invitation is accepted for that account. It must use the invited email address.
When you have joined, open the desktop app and sign in with the same email.
In the desktop app
Section titled “In the desktop app”On the app’s sign-in screen, choose Accept it here next to “Got an invitation?”.
- Enter the Organisation hub: the organisation’s address, for example
sift.fathom.operationalecology.io. - Paste the Invitation link or code from the email, and choose Continue.
- Enter your Full name and a Password, then choose Join followed by the organisation’s name.
If an account already exists for the invited address, the app asks you to sign in instead, and accepts the invitation as that account.
If an invitation doesn’t work
Section titled “If an invitation doesn’t work”- “This invitation has expired”: ask an admin to Resend it from the People page. You get a new link.
- “This invitation was withdrawn”: an admin revoked it. Ask them to invite you again.
- “This invitation has already been used”: sign in with the account you created.
- “This invitation link isn’t valid”: a newer invitation may have replaced it. Open the latest email.
- “This invitation is for another address”: you are signed in as someone else. Sign out, then open the link again.
The organisation may also have changed its Allowed email domains since the invitation was sent. Then the invitation can’t be accepted until an admin adds your domain.
- Organisations, the hub and sync: what syncs and what stays on each computer.
- Projects, members and roles: create the first project and add people to it.